There’s a difference between the strength it takes to initiate a move and the strength it takes to finish it. Learn how to build better contact strength for climbing so you can “stick the landing” and finish what you started!
It’s one thing to shoot for a hold, and entirely enough to actually latch it. Sometimes it’s a matter of commitment: do you want to actually land the move, or do you just want to be able to tell yourself that you tried? Maybe it’s a question of concentration: can you stay focused on where you’re going right up until you actually get there or do you get distracted too early?
Other times, though, it’s a matter of physical strength. There’s a difference between the sort of strength it takes to pull off of a hold (pulling power) and the kind required to catch a hold (contact strength). Most climbers put much more effort into training pulling power than contact strength. Neglecting contact strength, however, means you’re only addressing half of the equation. You may have the strength to initiate a move but not enough to actually “stick the landing” and complete the cycle of movement. With that in mind, think of contact strength as the rate of force development or “finger power” as you latch onto a hold.
It’s easier to train pulling power than contact strength. Intuitive exercises like pull-ups, lock-offs, and rows all improve a climber’s ability to generate movement from one hold to the next. These types of exercises are all relatively easy to understand and execute in pretty much any gym setting, climbing-specific or not.
Exercises that target contact strength, on the other hand, aren’t quite so simple. Effective contact strength training combined speed with shock loading. The movements need to be fast, dynamic, precise, and multi-directional all at once. Together, these elements target a climber’s reactivity: how well your body can respond to the change in force that takes place when your hand makes contact with a hold.
A caveat: Make sure to build up a solid foundation of finger, elbow, and shoulder resilience before delving into contact strength training. Even intermediate and advanced climbers with a long history of training for climbing need to respect the intensity involved. Your body can only handle so much stimuli when it comes to reactive force loading. It only takes a few quality sets to ingrain the effects. Results come quickly, but so do injuries—so stop well before reaching the point of fatigue.
Consider this list of contact strength exercises a progression from least to most stressful in terms of force load and injury risk. Try not to rush the process; stick with one for weeks, or even months, before progressing to the next level of intensity. You’ll build the resilience you need for the next exercise in line by patiently mastering each one in order.

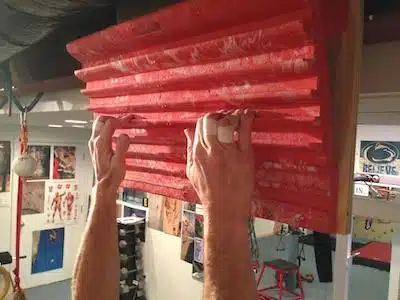
Turn to the campus board for these exercises that improve contact strength for climbing.
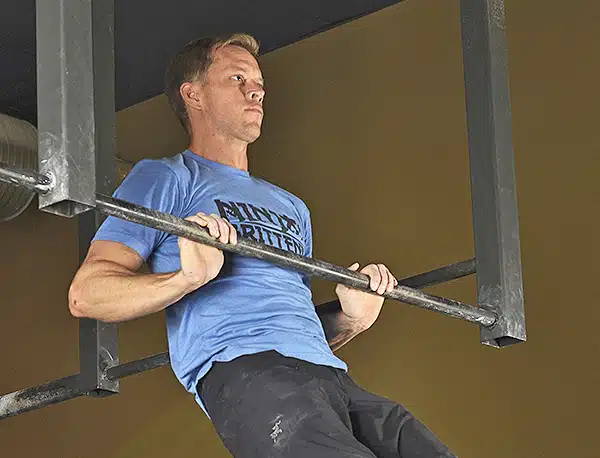
One-Arm Lunging
Keep your feet on the wall for this exercise, or even flat on the floor. Position yourself under the largest rungs or sloper rails on a campus board. You’ll be moving between the two lowest rungs or rails on the board.
Start with both hands on the higher one, then release one hand down to your side, making sure that your weight remains evenly balanced between your feet. Pull inward with the hand that remains on the wall until you reach the point of near-weightlessness, or the “deadpoint” zone in your arc of motion. At that point, let go and drop down to the lower rung. Lean back slightly to accommodate the change in angle without changing the bend in your elbow or losing engagement in your rotator cuff, scapula, and chest.
Think like a spring and bounce right back up to the upper rung before the force fully settles from the downward lunge. The transition from one rung to the next should take no more than a second or two. There’s no true stopping point in this exercise; as soon as your fingers and shoulders absorb the forces, you’re back to create them again in the other direction. Lunge back forth for three sets of six to ten reps per hand.
Campus Laddering
While laddering makes a great introduction to the campus board for beginners, it’s also a smart exercise for advanced climbers to use on a more frequent basis than higher intensity contact strength exercises. Either way, you’ll want to keep your ego in check. The point of campus laddering for contact strength is not to make the biggest jumps between rungs that you can. That kind of movement trains pulling power more than contact strength. Keep your reaches short and resist the temptation to skip rungs.
Starting at the bottom rung, hang from both hands with straight yet activated arms. Climb up the campus board hand-over-hand as quickly as possible. Aim to eliminate as much dead time between moves as possible so one hand lifts off as the other latches the next rung. It should feel like a sprint for your upper body, so don’t be surprised if you get winded!
Increase the difficulty by boosting your speed, graduating to smaller rungs, or even adding a weight vest. Perform three sets of ladders with two to three minutes of rest in between, with the goal of building up to ten total sets with 30 to 60 seconds of rest in between. The shorter the rest, the more aerobic training you can weave into this exercise as well.
Campus Bumps
This exercise is like a ladder for one hand at a time. That means that each hand will experience a higher rate of force development in the finger flexors as you catch each rung than when alternating between both hands.
Beginning in the same position as before on the bottom rung, bump one hand up to the next rung without moving the other hand from the first. Bump the moving hand up as many rungs as it can reach, making sure not to skip any rungs in the process. You’re going for a series of short and quick moves with the upper hand while the lower one pulls further and further down into a deep lock-off. Most climbers will be able to bump three to four times before maxing out their span. Stop before the upper arm has to straighten completely in order to reach the next rung; a slightly bent elbow and engaged shoulder is important for protecting the joints from hyperextension.
Just like the ladders, start with three sets spaced out by two to three minutes of rest and work up to a maximum of ten sets with minimal rest in between for the sake of aerobic training.
Campus Switches
Campus switches involve an added element of coordination. You’ll be moving both hands at the same time to perform these campus switches, which increases the rate of force development from throw to catch even further. Keep your wits about you during the switch to go from air time to a precise landing with each hand simultaneously.
Grip the largest campus rungs in an open-hand position, one hand on the lowest rung and the other on the rung right above it. Keep your hands shoulder-width apart as opposed to stacked in line with one another. Pull off the ground with bent arms and engaged shoulders. Think about puffing your chest out to reach the ideal level of engagement in your pecs and scapula. Starting in an activated stance is important for preparing your body to absorb the forces of impact. Pull up and in with both hands the same way you have in the previous exercises, and release your grip on both sides as soon as you reach the point of near-weightlessness. Switch places with each hand so they end up in opposite positions. Let yourself sink slightly into the new position as your body resettles into its center of gravity, then initiate the next switch. Try to keep your torso as stable as possible when making the switches while your hands and arms see most of the action.
The transition might feel clunky at first. With time, your coordination will improve alongside your contact strength. Advanced climbers can aim for upwards of ten hand switches over the course of five seconds.
Campus Double Dynos
There’s a reason this one is listed last. Do your fingers a favor and hold off on double dynos until you’ve perfected each of the exercises leading up to it. Coach Hörst discourages most climbers from attempting campus board double dynos until they’ve reached the 5.13 or V9 level at a minimum and have at least five solid years of climbing experience under their belts.
If that’s you, and you’ve worked your way through the list of contact strength training exercises without taking shortcuts, then start with both hands on a medium-height rung of the campus board. Get into the same position as the prior exercises: slightly bent elbows and activated shoulders. Release your hands and catch the rung immediately below, absorbing the forces and settling into the same engaged position that you started in. Pull in slightly to initiate some upward momentum, then launch with both hands back to the upper rung. Repeat in both directions for three to five reps without hesitating in between catches.
Be sure to rest well for several minutes in between sets. Even better, use the downtime to check in with your fingers, arms, and shoulders. Shake them out, make sure they’re activating properly in response to the forces, and evaluate for any pain points. As with any of these contact strength exercises, prudence pays off. Do just enough to train your body to commit to all stages of dynamic movement, from launch to catch.
Related Articles:
- Video: Contact Finger Strength Training for Climbers
- Video: Campus Power Training
- 5 Reasons Why Stronger Fingers Equals Better Climbing
- Intro to Hangboard Training
- Power Bouldering for Dynamic Drive on the Wall
Copyright © 2000–2023 Lucie Hanes & Eric J. Hörst | All Rights Reserved.