Everyone wants strong fingers, but not everyone understands just how to do it right. Learn four essential fingerboard training protocols to improve your climbing strength and endurance.
(This article was originally published in November 2016).
In terms of physical attributes, increasing relative peak finger force is central to taking your climbing to the next level. Think of this as the finger force you can apply to a rock hold in relation to the body mass the fingers must support. Improving this finger strength-to-weight ratio is possible by increasing the numerator (greater finger strength) and decreasing the denominator (lowering body mass). Duh!
Beginner and intermediate climbers can often increase their strength-to-weight ratio fastest by improving body composition (reducing unwanted muscle and excessive fat, within reason) and by improving quality of movement (apparent strength gains via increased climbing efficiency). Furthermore, excessive finger strength training is unwise and potentially injurious during a climber’s formative months/years—finger tendons take many months (and perhaps years) to adapt to the unique stresses of climbing. The bottom line: a beginner will experience steady gains in apparent strength—and strength-to-weight ratio—simply by climbing a few days per week, optimizing body composition, and striving to improve movement and mental skills week over week.

Simple Board by Tension Climbing.
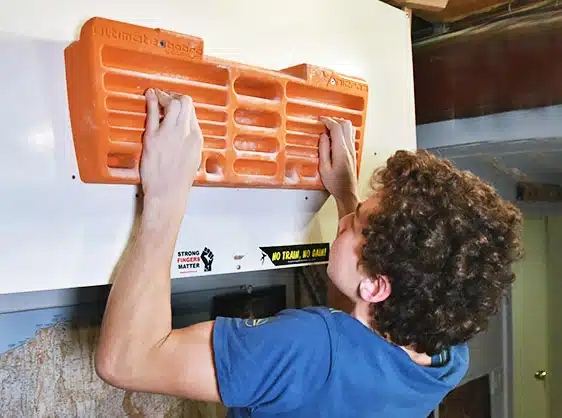
More experienced and elite climbers must take a different approach, however. Assuming these advanced climbers already possess a high level of climbing skill and good base fitness, improving finger strength-to-weight ratio is possible only by way of training to increase the amount of force the finger flexors can apply to a rock hold. The best training tool for this mission (should you accept it!) is the fingerboard.
While there are many different fingerboard training methods/protocols/programs (some good, some bad) in the public domain, detailed below are four evidence-based protocols that work. Experienced climbers, with no recent history of injury to the fingers/elbows/shoulders, can employ one of these maximum-grip-strength protocols on a twice-a-week basis as supplement to time spent climbing. Aggregate number of rigorious climbing and finger training days per week must not exceed four—resting the fingers a minimum of three days per week is essential for neuromuscular recovery and finger tendon remodeling. Break this rule and you’ll likely end up “broken”….in one way or another. If you’ve experienced a climbing injury, here’s a great podcast delving into common causes, prevention, and rehab of common overuse injuries.
3 Fingerboard Training “Maximum Strength” Protocols
Always perform a thorough warm-up before using one of the following fingerboard programs. Ideally, begin with a general, full-body activity to elevate heart rate—alternatively, engage in fifteen to thirty minutes of easy climbing or intermittent non-maximal bouldering. If training at home (no wall available), do some jumping jacks (to get your blood flowing), a few sets of pull-ups on jug holds and, finally, a few bodyweight hangs on a variety of fingerboard holds. Conclude your warm up with some mild stretching and massage of the forearm flexor and extensor muscles.
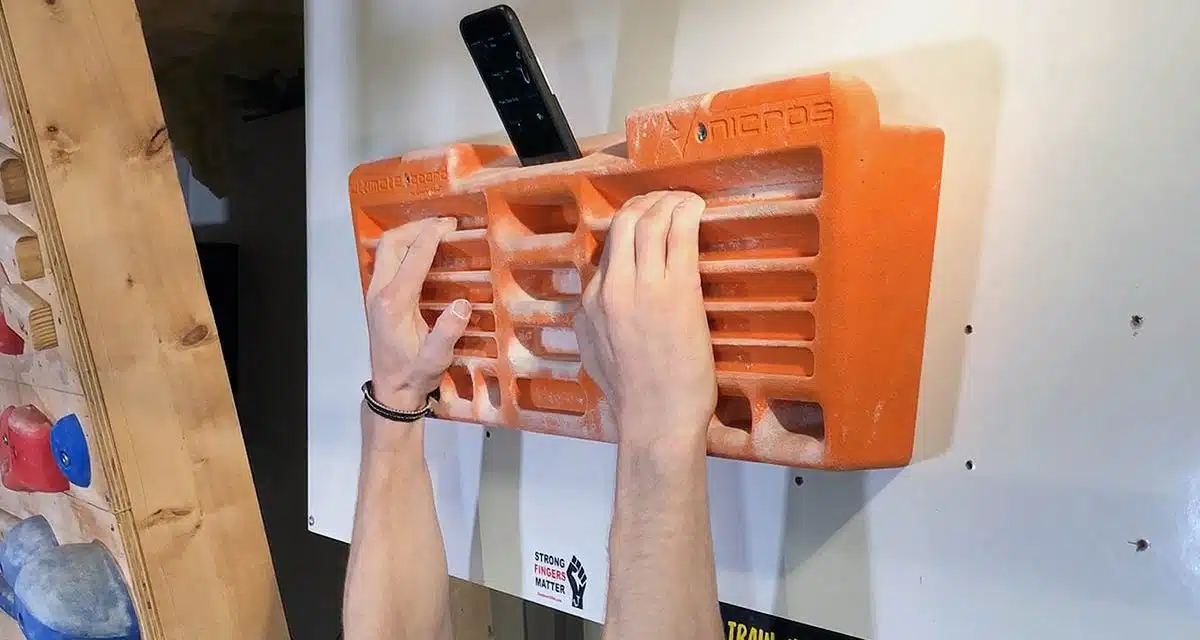
“Minimum Edge” Protocol

Transgression by Eva Lopez-Rivera.
Based on research by Eva Lopez-Rivera, this low-volume protocol is what I recommend as an entry-level fingerboard program (not to be confused with a “beginner climber’s” program—beginners shouldn’t fingerboard train). A few multi-week cycles will bring noticeable gains in finger strength for intermediate climbers, as well as serve as preparation for delving into weighted fingerboard hangs (described next). You’ll need a fingerboard with many different-size edges and pockets, and then you’ll need to experiment a little to identify what features you can hang on for just 15 seconds or so. Actual training hangs should terminate a few seconds before failure of the grip, so I recommend making each hang exactly 12 seconds in length. By design, this training protocol will produce little or no muscle pump as it primarily targets the anaerobic alactic energy system.
- Do a 12-second hang using a feature that you can barely hold for 15 seconds with maximum effort.
- Rest for exactly 3 minutes.
- Do four more hangs following the above protocol. Each hang should be near maximal (rating of perceived exertion of 9 to 9.5 out of 10), but not quite take you to failure.
- After doing the first set of five hangs, rest for 5 minutes before doing a second set of five hangs. Initially focus on training the half-crimp and open-crimp grip—one set each. Advanced climbers can do additional sets that target two-finger pockets (open-hand grip) and pinch grip. Be sure to rest at least 5 minutes between sets.
Maximum Weight “10-Second” Protocol
A period of dedicated minimum-edge fingerboard training will eventually lead you to the point of needing to train on tiny, painful edges to keep with the protocol detailed above. Enter the “maximum weight” protocol, which involves using larger, more comfortable holds, but with added weight to create sufficiently high intensity for maximum-strength adaptations. The ideal size edge for weighted fingerboard hangs is between 14mm and 20mm (5/8 to 7/8 inch), or a little less than one finger-pad depth—this moderate size lessens skin pain, reduces strain on the distal finger joint, and has been proven effective to develop maximum-strength gains that will carry over to different-size edges on the rock.

Hanging weight plates from harness via Rogue loading pin.
This and the next exercise present two maximum-weight hangboard protocols that really work. Do two to five sets of one or the other—not both!—focusing mainly on the half-crimp or open-crimp grips, although advanced climbers may want to dedicate a few sets to pocket and pinch grips. The amount of weight added will be significant (generally between 25 and, for elites, 100 pounds!), so you’ll need to invest in a heavy weight vest, several weight belts, or hang a combination of free weight plates from the belay loop of your harness. The latter is the best solution when working with a high amount of weight since you can easily unclip the weights to de-load between hangs and sets.
- Do a 10-second hang using a feature that you can barely hold for 13 seconds with maximum effort. Adjust weight as needed to meet these criteria.
- Rest for exactly 3 minutes.
- Do four more hangs following the above protocol. Each hang should be near maximal (rating of perceived exertion of 9 to 9.5 out of 10), but not quite take you to failure.
- After doing the first set of five hangs, rest at least 5 minutes before doing a second set of five hangs. Initially focus on training the half-crimp and open-crimp grip—one set each. Advanced climbers can do additional sets that target two-finger pockets (open-hand) and pinch grip. Be sure to rest at least 5 minutes between sets, and adjust the amount of weight added for each set (and grip position) to stay within the guidelines detailed above.

Maximum Weight “7-53” Protocol
This is a more advanced maximum-weight protocol that I created to train maximum strength and foster more aerobic power (by stressing the muscles to increase rate of CP resynthesis during the 53-second rest between maximal hangs). It’s also a very time efficient protocol if you are doing multiple sets. This is my favorite fingerboard protocol!
- Do a 7-second hang using a feature that you can barely hold for 10 seconds with maximum effort. I recommend using 14 – 20mm edges, 20-30mm two-finger pockets, and deep tendon-friendly monos if you’re strong enough. Use enough weight to make a 10-second hang extremely difficult, yet each training hang must terminate at 7 second (i.e. a few seconds before failure).
- Rest for exactly 53 seconds. This way each hang-rest couplet takes exactly 1 minute.
- Do two more hangs following the above protocol. Each hang should be near maximal (rating of perceived exertion of 9 to 9.5 out of 10), but not quite take you to failure.
- After doing the first set of three hangs, rest 3 to 5 minutes before doing a second set of three hangs. Initially focus on training the half-crimp and open-crimp grip—one set each. Advanced climbers can do a second set for each half- and open-crimp grips, or do additional sets that target two-finger pockets (open-hand grip) and pinch grip. Be sure to rest at least 5 minutes between sets. Limit yourself to a maximum of five sets.
1 “Strength-Endurance” Protocol: 7/3 Repeaters

The Rock Prodigy by Trango, Inc.
Repeaters are one of the original and most popular fingerboard training methods because they closely mimic the grip-relax repeating sequence of climbing. Most repeater sequences in the public domain are executed at bodyweight and at high volume—thus, training endurance far more than strength. The following repeater protocol, popularized by the Anderson brothers in their Rock Climber’s Training Manual, does employ added weight and limits each set to about 1 minute. Therefore, this fingerboard protocol is a sort of bridge between maximum strength training (previous exercises) and endurance training (to be covered in an upcoming article).
- Pick three to seven different grip types to train. In addition to the half-crimp and open-crimp grips, select a few others such as open hand, two-finger pocket “first team” (middle pair), two-finger pocket “second team” (inside pair), wide pinch and narrow pinch. You will perform one (entry-level) to three (advanced) sets of repeaters with each grip position.
- Each set is comprised of 6 hang-rest intervals consisting of a 7-second hang and 3-second rest. Therefore, each 6-hang set will take about 1 minute. Add weight, as needed, to make each hang challenging but yet not so heavy that you can’t complete a set of repeaters (the amount of weight will be much less than in the two previous maximum weight protocols). Watch a video detailing the 7/3 protocol.
- Rest three minutes between sets.
Always Hangboard with Proper Technique!
No matter which fingerboard protocol you use, it’s essential to train with good technique. Maintain muscular tension throughout your shoulders and upper torso by engaging your scapular stabilizers and rotator cuff—think “shoulders down, chest out”. Never hang with relaxed/passive shoulders and a hollow chest! Lift your knees only slightly to develop necessary core stiffness; never train with the full-crimp grip (i.e. with thumb lock). Also important: engage in twice-weekly training of the scapular stabilizers and rotator cuff muscles—consult Training For Climbing for comprehensive instruction on antagonist, stabilizer, and forearm flexor muscle training….and a whole lot more!

Support stronger, healthier fingers! Learn more >>
PRO TIP: Nourish Your Tendons Before Each Fingerboard Workout!
A growing body of in vitro, in vivo, and elite-athlete case studies have demonstrated the benefits of a specific pre-exercise nutritional protocol intended to amplify collagen synthesis and accelerate tendon/ligament recovery. Consuming vitamin C-enriched hydrolyzed collagen before tendon/ligament training is the lynchpin of the protocol shown to double collagen synthesis after exercise. This is revolutionary information for a hard-training climber wanting to develop stronger, more injury-resistant tendons and ligaments/pulleys! Read more here >>
Copyright © 2000–2023 Eric J. Hörst | All Rights Reserved.