Projecting is all about long-term investment, but that doesn’t mean that you can’t make it more efficient. Prevent burnout on your project by learning 10 tips and techniques for speeding up the redpointing process!
Projecting is the process of working a route near, or beyond, your current limit with the goal of solving and sending it as quickly as possible.
On a project just below your limit, you might find yourself making an ascent within just few tries. Pick a project that stretches your limits, however, and you may very well be in for several arduous days (or weeks) of working on, falling all over, and training specifically for the breakthrough send. Either way, effective projecting requires a strategic approach to solving the crux moves, connecting the sequences, and developing a sincere belief that you can in fact send.

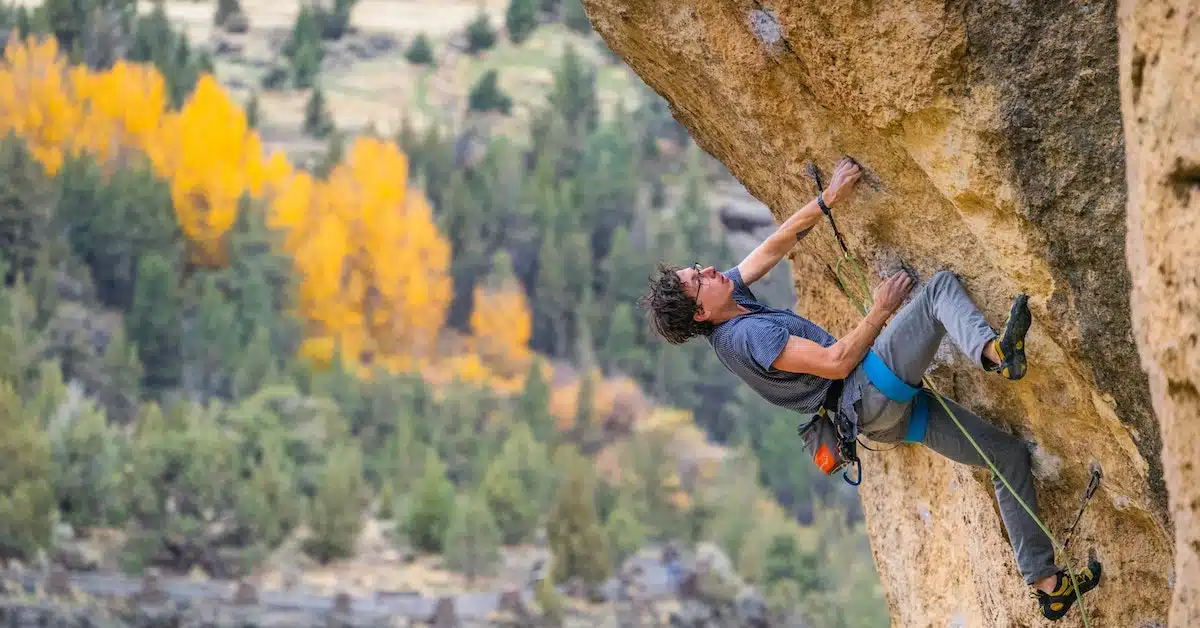
Effective redpoint climbing often comes down to tactics more than brute strength. Photo by Ben Kitching.
Tips for Effective Redpointing
Here are 10 Do’s and Don’ts for working—and eventually succeeding—on your projects!
1. Don’t view the project as one overwhelming challenge that must be attacked move-by-move from the ground up. Do break down the route into manageable chunks defined by rest locations or gear placements. Solve each chunk as a boulder problem of its own. Allow for feelings of positivity and intermittent success that build with each chunk that gets solved.
2. Don’t rush to judge how the crux sequence must be done. Never assume that the sequence used by others is the best one for you. Do hang on the rope liberally so that you can test various possible solutions to the crux. Widen your perspective and search for creative solutions like sidepulls, underclings, hand matches, hidden footholds, heel hooks, and unchalked intermediate holds. Discovering new handholds, body positions, or foot finesses often make the “impossible” possible!
3. When struggling with a difficult move, don’t focus on just powering through it. Do focus on the sensations (like proprioception from your arms, legs and torso) of doing the move successfully and compare these feelings with those of your failed attempts. Noting the physical sensations you get when doing a move or sequence correctly can be a powerful resource to tap into when you hit this crux section on your redpoint attempt.
4. Don’t overpractice the crux section or lower chunks of the climb at the expense of time on the final chunk to the anchors. This is an approach that often leads to disappointing “heartbreaker” falls just short of the top. Do practice the final chunk of the route enough to build confidence in being able to cruise it in a fatigued state.
5. Upon solving the crux chunk, don’t rush straight to the next. Do immediately lower down and repeat the crux section a second (or even third) time to make sure that you know the sequence well and cement the proprioceptive feel of successfully executing it in your mind.
6. When working a safe (i.e. well-protected) climb, don’t let the fear of falling sabotage your efforts. Assuming that conditions are safe, do take a few practice falls from the very spot you fear falling from. You’ll soon discover that the fear has dissipated with practice, and you can now work the route free from apprehension and anxiety.
7. When resting on the ground between practice burns, don’t just sit down and ponder your chances of success or failure. Do go for a short walk to shake off the stress and take a mental break from the climb. Take the time to rehydrate, refuel, and refocus. After a few minutes of strolling around, return to the base of the route and engage in some mental rehearsal of the ascent. Rest a total of 20 to 45 minutes between practice burns or redpoint attempts.
8. If you can’t send the route on the first or second day of work, don’t give up! Do return home and build a simulator of the crux sequences on your home wall or at the local gym. Work the simulator sequence several times per workout to hone the specific motor skills and strengths needed to send the proj. Additionally, plan out an exercise program that targets each limiting physical constraint on the project climb (such as power, endurance, crimp or pocket pulling, or lock-off strength). Supplement this physical practice with 10 to 20 minutes of visualization in which you create a mental movie of the route with as much sensory detail as possible.
9. When returning to the scene of the climb after a few days off, don’t just rope up and go for the send “cold.” Do climb the route bolt-to-bolt (or rest-to-rest) to physically and mentally prepare for a successful ascent. Work through the flash-pump stage of getting warmed up, and then rest 20 to 45 minutes before going for the send.
10. As you rope up for a redpoint attempt, don’t fall into the trap of feeling that you must send the route on this go. Such thoughts trigger a detrimental pressure to perform. For many climbers, the fear of failure results in an emotional weight that stacks the deck against a successful outcome. Do foster an expectation of success based on the knowledge that you’ve worked all the moves and perhaps even trained specifically for the climb, while also acknowledging that failure is part of the process. By accepting that it’s okay to fail—and believing that success is inevitable in the end given enough time and effort—you increase the odds of succeeding by eliminating the fear of failure. Empty your mind, engage the moment, and let a successful redpoint unfold one move at a time.
(This article was originally published in July of 2021, but these tactics age like fine wine!)
Related Articles:
- Five Tips for Improving Your Climbing Efficiency
- Four Tips for Becoming More Head Strong!
- 8 Superpowers of the Very Best Climbers
- Overcome Your Fear of Failure
- Anatomy of a Redpoint
Copyright © 2000–2023 Eric J. Hörst | All Rights Reserved.